This tutorial describes the process to create a layout in PhotoShop and PhotoShop Elements using a layered .psd or .tiff file.
You can try this on your own using the Freebie Template (see link at right). For this example, I used the freebie template and a paper from Paula Yagisawa's Hula Honey Mini Kit.
1. Open the .psd or .tff file. Resave with a new name, so that you don't accidentally overwrite the template file with your layout.
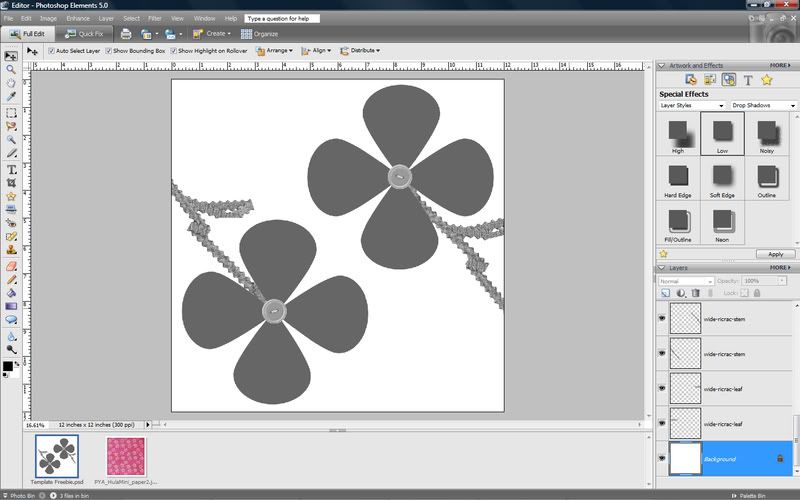
2. Select the layer in the layers palette which you wish to work on.
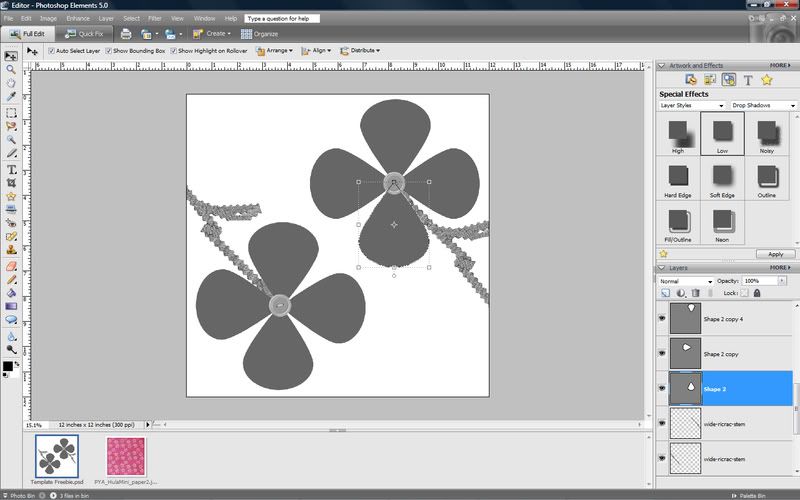
3. Copy/open the paper or picture which you would like to have take the shape of the selected layer. There are lots of ways to do this. (I usually have it open and just drag it in.) It should automatically get placed above the selected layer. If it does not, you will need to move it up or down in the layers palette until it is above the layer you are working on.
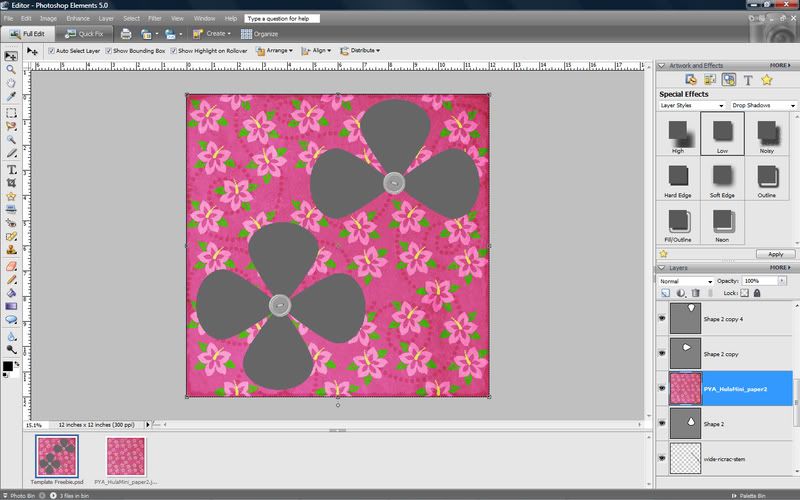
4. Group the layer with the previous one, which will cause the paper/photo layer to take the shape of the layer below it. This is the magic! Here are three different ways to do this:
- With the paper/photo layer selected in the layers palette, select Layer-group with previous from the drop down menu.
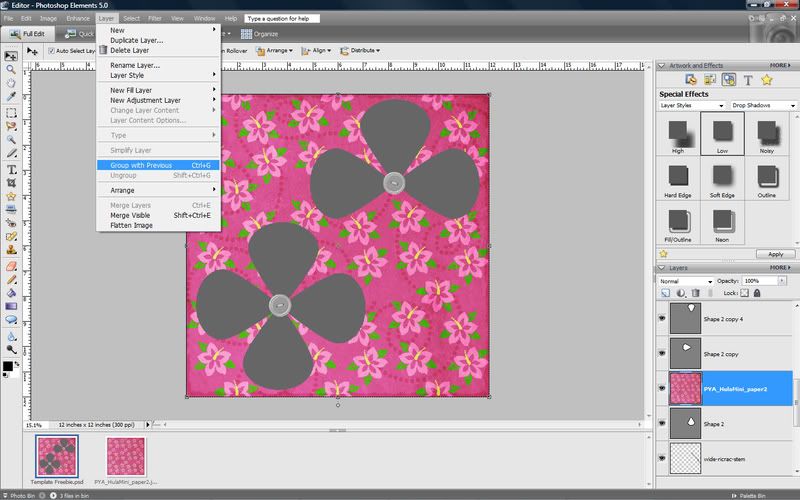
- With the paper/photo layer selected, use the keyboard short-cut ctrl-g (PC) to group the layer with the previous.
- Place your cursor over the line separating the two layers in the layers palette and hold down alt. The cursor will change from a hand to an image with a little black arrow next to some overlapping circles. Click, and it will group the layers.
Whichever method you use, you will notice that your paper now takes the shape of the layer below it, and in the layers palette, it has been indented slightly with a little arrow in front of it.
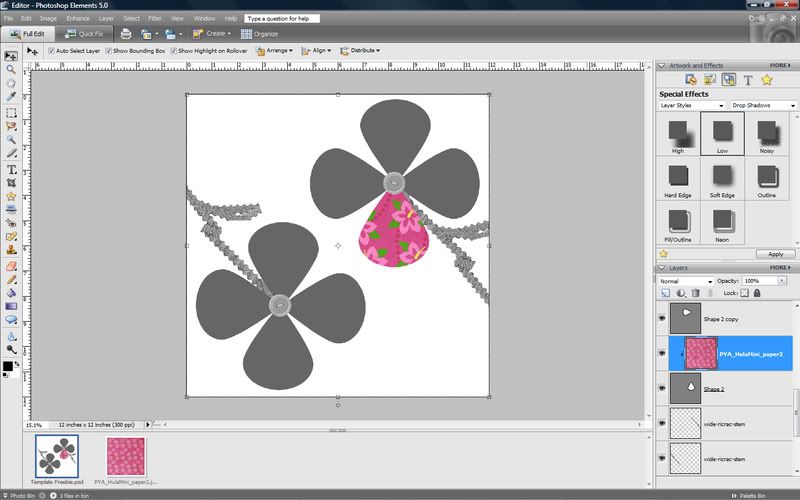
5. With your paper/photo selected, you can now move and resize it so that the part you want to see is visible.
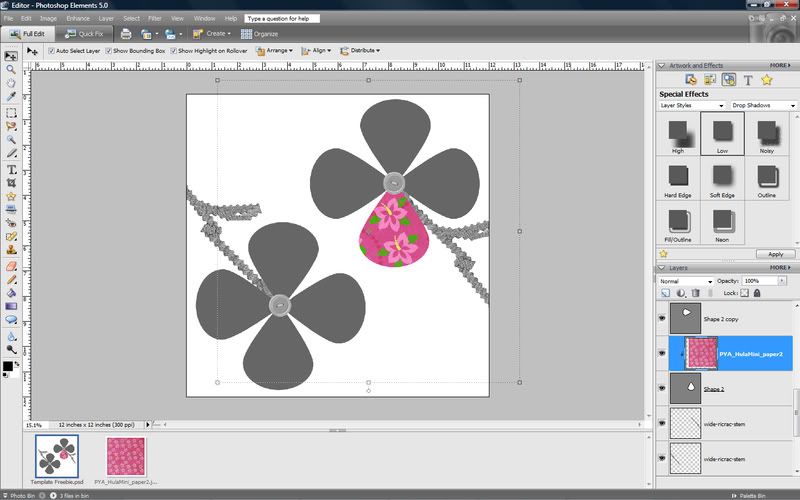
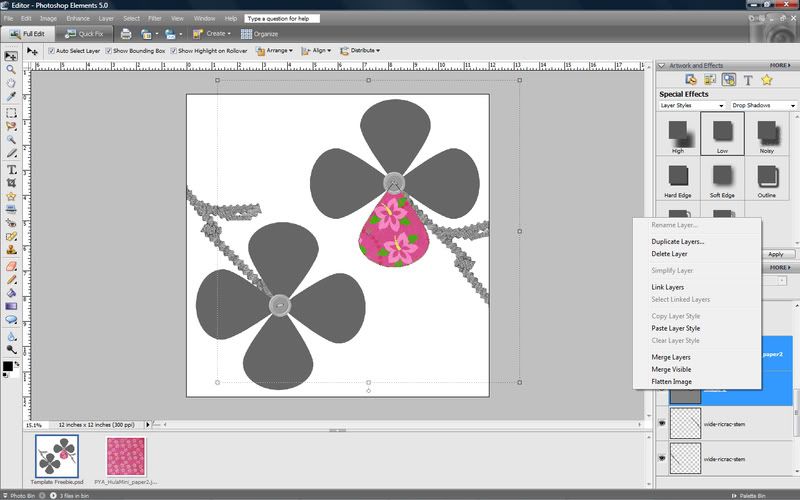
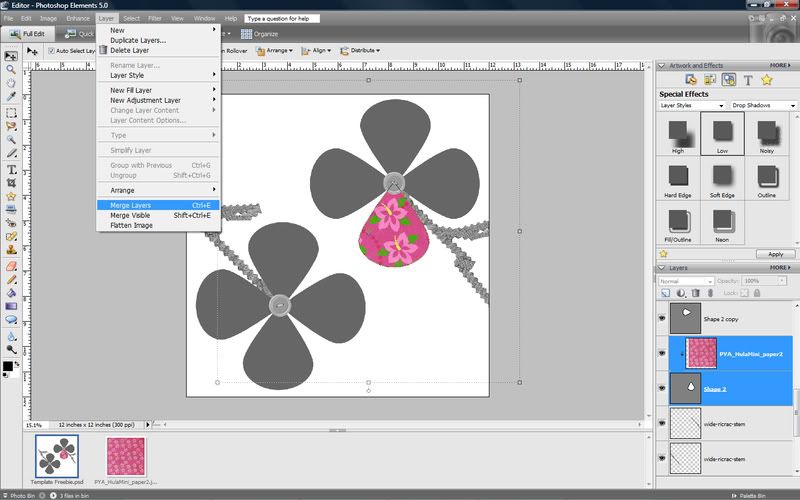
6. Highlight both layers (hold down shift and click on both) and then merge the layers together. (Some people skip this step, but I find it helps me have a less cluttered layers palette.) To merge layers do one of the following, right click and choose merge layers; hit ctrl-e; or select Layer-Merge layers from the drop down menu.
7. Apply any shadows or layer styles you wish to the layer.
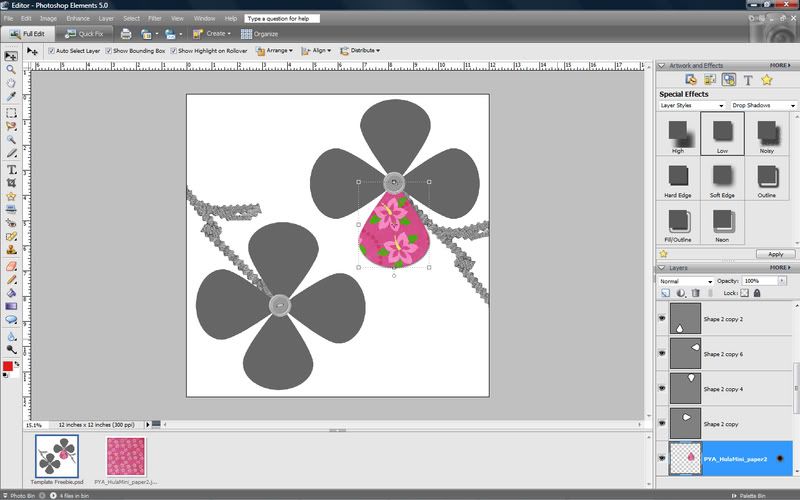
8. Repeat the process with the other layers of the template.
9. Some layers, you may wish to simply replace the shape with an element (such as a button or ribbon) from your digital stash. Some layers may actually be items that you can recolor (such as the buttons and ricrac in the template example.) See the tutorial on recoloring elements to learn how to recolor these objects.
10. Most important, remember, a template is only a guide. Make it your own by adding and subtracting elements or papers, or moving things around!

 Chipboard Freebie
 Template Freebie
 Brag Book Challenge - Jan 2009
 Quick Start Challenge - Feb 2009
 Twist This Template - Feb 2009


No comments:
Post a Comment