
This method works for around 90% of all quick pages. If you want to do some creative layering, you might have to play around to get it to work - or if you want two angled photos to overlap each other - the top photo will need to be done with more of a traditional method. But, this will work for MOST quick pages.
First, what is a quick page - it is a layout that has an opening in place of the photo and is saved in png format. The user simply places their photo "behind" the quick page and moves it into place for a finished layout. You can have places for more than one photo - and places for journaling.
These instructions will be based on a 12x12 page and should work in any version of PSE.
1. create a new image - 12x12 with 300 dpi (double check these settings)
2. flood fill this transparent image with any color - this will be used later but will never be seen.

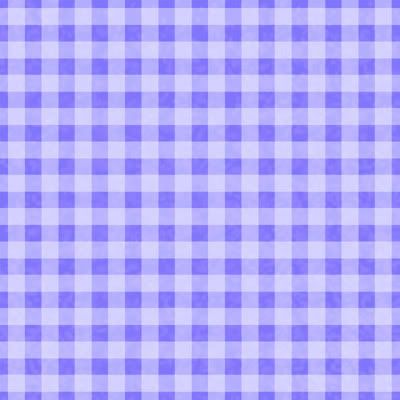
3. Copy the paper you want to use as your background and then paste it into your working image (it should automatically go in as a new layer). Shortcut keys: ctrl A to select all in the paper image - ctrl C to copy it. Click on the new image and press ctrl V to paste the paper into the image.
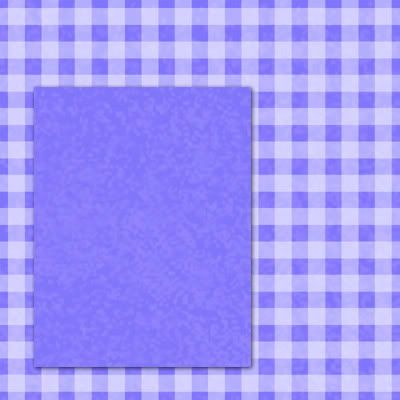
4. Next, build up your other paper and photo items - I added a paper mat and a rectangle to take the place of the photo. These don't have to be perfectly placed - you can move them later if needed! Just make sure each is on it's own layer - and add your shadows as desired

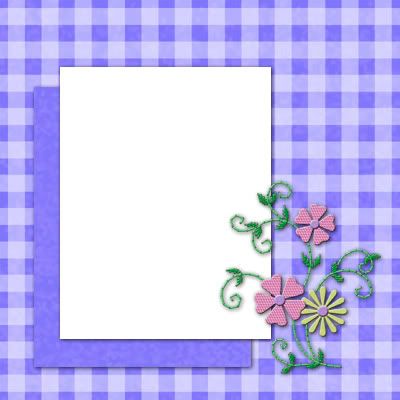
5. Now, add whatever other elements you want - these can be "over" the picture. Add shadows as you go and make it perfect - just as if it was a layout. I decided to rearrange my layout and moved the mat and photo.
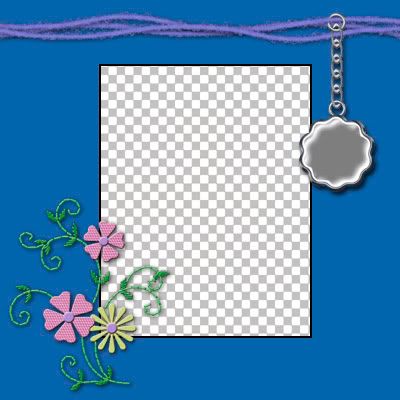
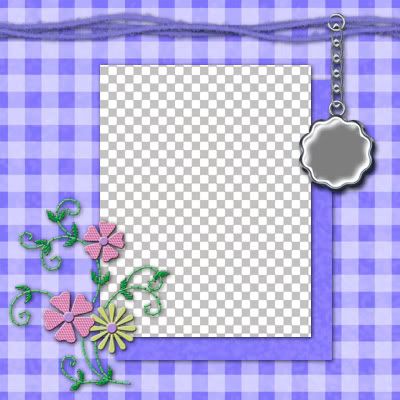
6. Once you are happy with the look of your layout, save it as a .psd file. Now, make the "photo" layer active and use the magic wand selection tool to select the photo space. I've used a line to represent the selection.
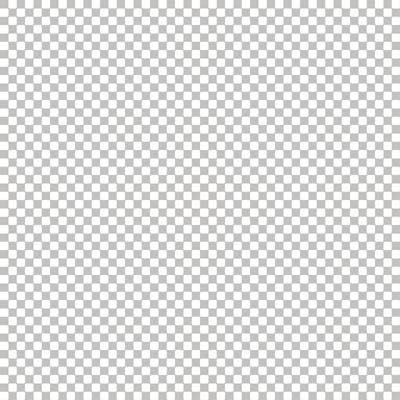
While it is selected, make the original filled layer active and then clear the selection (edit - clear). I've made the paper and photo layers invisible so you can see this layer. Once it is cleared, you will see the grey and white check pattern that shows you it is invisible.
7. The final step is what I call the "magic" step. Moving through the layers, one at a time, you will "group" each layer down to the filled layer. Start with the paper - then the paper mat - finally the photo. On each layer, press "ctrl G" - to activate the clipping mask or grouping function. When you get to the photo layer, you will see that it now looks like a finished quick page!
Don't forget to save it as both a .psd and a .png file!
*** If you decide to make changes - fill in the original flood filled layer and make the desired changes! You aren't actually "cutting" any of the other layers, so changes are easy!
This method will work for a variety of paper and photo shapes and sizes - but don't overlap the photos until you have practiced this basic method first.
One final note... I've found that if I rotate my "photo" - the opening sometimes has rough edges. To fix this, make the filled layer active and carefully erase the very edge of the opening. I use the eraser set with a solid shape - pixel size of 4 or 5 - and click in one corner... then move to the next corner and press shift then click again. Continue all the way around and you have a clean opening!
 Chipboard Freebie
 Template Freebie
 Brag Book Challenge - Jan 2009
 Quick Start Challenge - Feb 2009
 Twist This Template - Feb 2009


No comments:
Post a Comment