The following "image lesson" explains a very simple way to accomplish this that should work in any software. I've included additional tips and notes in the text to help you with other methods or techniques.
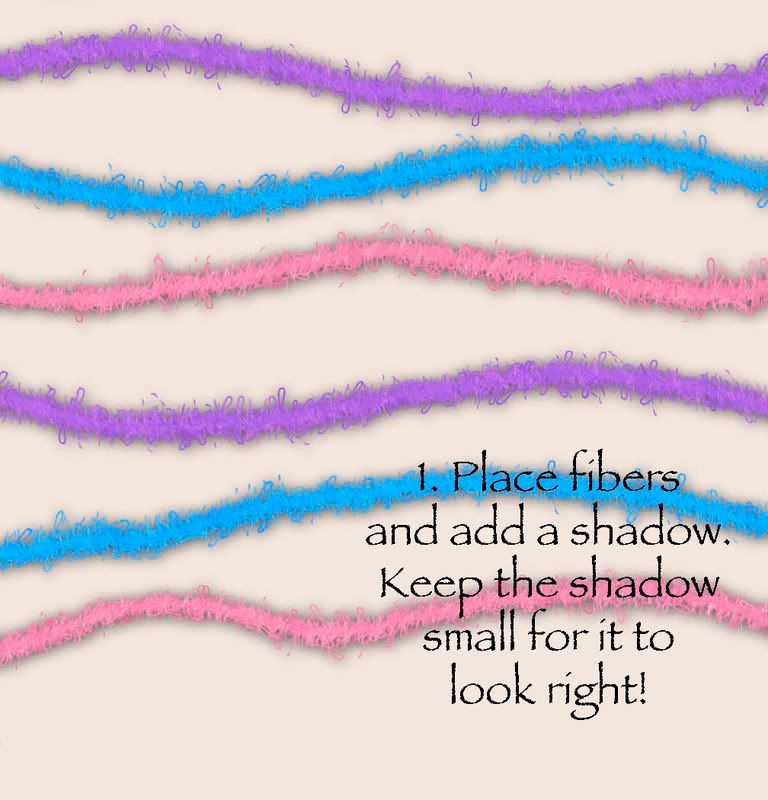
I always add and place my fiber elements before the piece I'll be hanging on it or placing over it.
Tip: To get a small shadow, try seeing if you can set the size to ZERO. In PSE, this will give you a very small shadow that shows slightly all the way around the element! Perfect for fibers or stitching or such
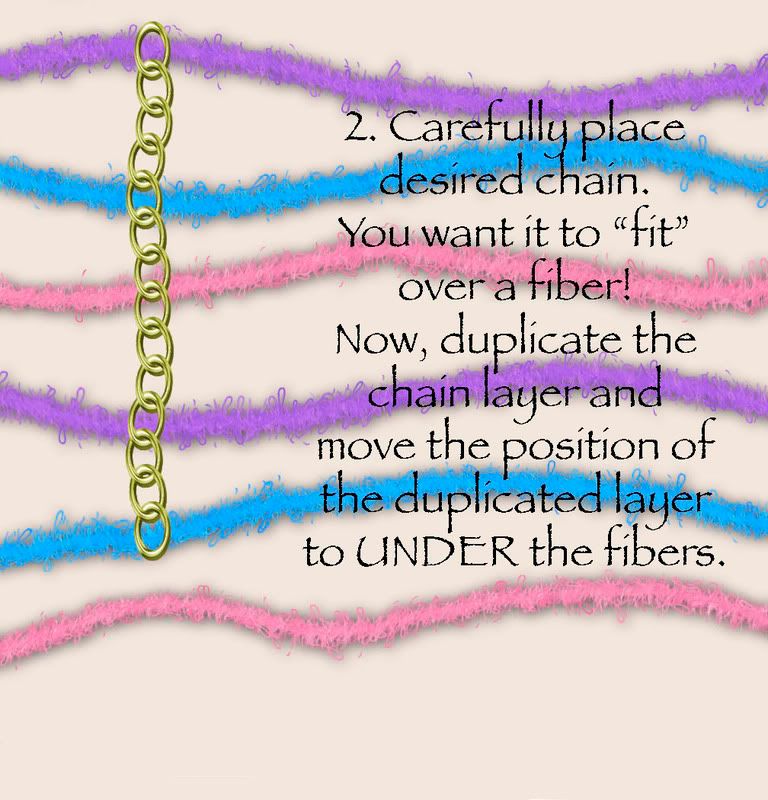
Since you'll be duplicating the layers, it's best to get your placement right BEFORE you duplicate the layer. When you change the layer position - that is changing the order of the layer, not where it appears on the layout. If you ever need to shift the placement of the element, you should link the duplicated layers together; this will cause both layers to move in exactly the same way.
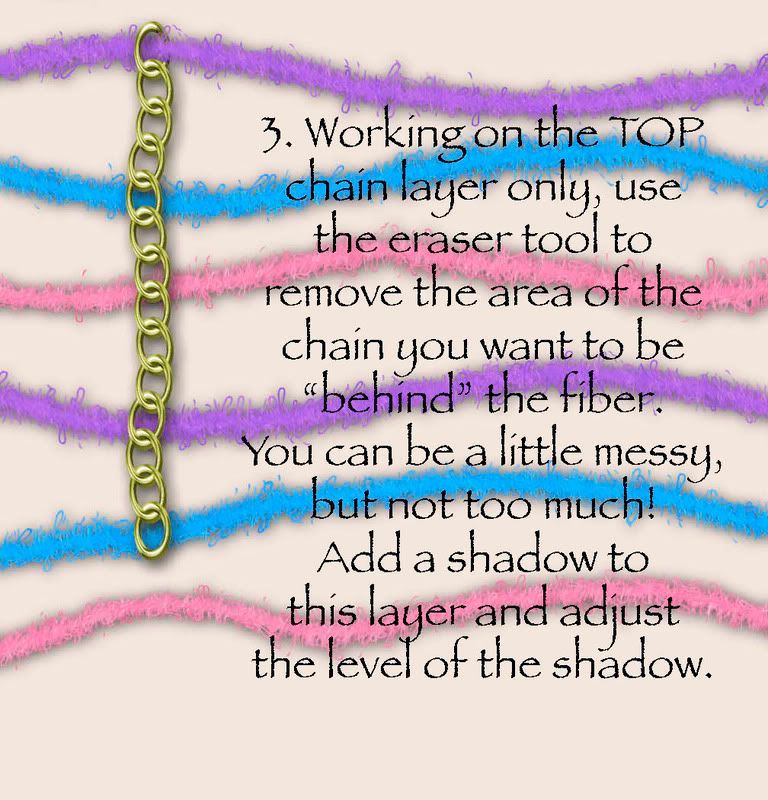
You can add the shadow to the charm/chain before you do your erasing - with the illustrated method, it doesn't make any difference.
Sometimes (and in some programs) you'll find that when you erase the top layer, you get odd shadows. To prevent this, you can add the shadow first and then simplify the layer (PS term - not sure in other software) - you want to cause the shadow pixels to be part of the element/layer instead of a style/filter that is adjustable. Now, when you erase the top layer, you won't get odd shadowing!
Depending on what type of elements you are working with, you might find it easier to use your magic wand selection tool to highlight on the fiber layer background. Invert the selection and then work on the top layer of the charm/chain. Now, you can ONLY erase the areas that are over the fiber! You'll still need to erase instead of just clearing - since other areas are also selected.
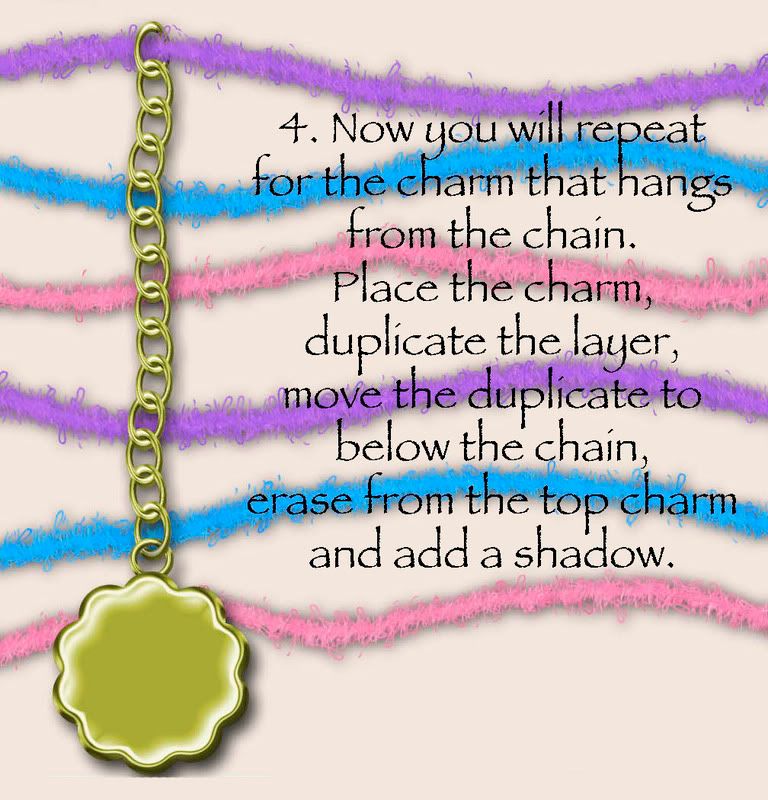
You can "fit" the chain loop as tightly to the charm as you want - just make sure they look realistic!
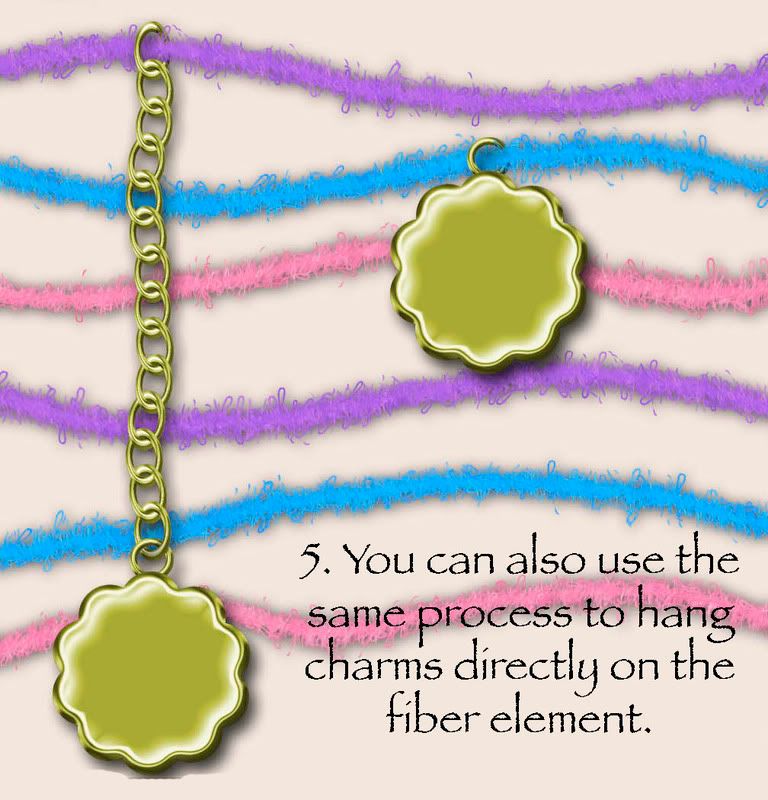
This same technique works to weave ribbons or to add a ribbon slide to a ribbon. You'll find many ways to use these same basic techniques!
As with so many techniques, there are several ways to accomplish the same thing. Using the double layer method isn't always necessary, but it helps to make your end results more realistic.
If you are working on something that will also need a shadow ON the top layer of the element, you might have better results from drawing it in yourself. Do this on a layer all alone (under that top layer). You know, this might just make a great future tutorial!

 Chipboard Freebie
 Template Freebie
 Brag Book Challenge - Jan 2009
 Quick Start Challenge - Feb 2009
 Twist This Template - Feb 2009


No comments:
Post a Comment